As an Amazon Associate, we earn from qualifying purchases. This helps support our site at no extra cost to you.
Solar Panels for Golf Carts: Roof Kits & Range
Quick Answer: Solar Panels for Golf Carts
Solar panels for golf carts work best as a roof-mounted range extender, not as a full replacement for plug-in charging. For most electric golf carts, a 100W to 160W flexible roof panel with a boost MPPT controller is the simplest setup. Larger 260W to 400W systems can add more daily range, but only if the roof has room, the cart parks in direct sun, and the controller matches the 36V, 48V, or lithium battery pack.
Golf cart solar panels are one of the most practical upgrades you can make to an electric cart. A roof-mounted panel adds 5 to 12 miles of free range per day, extends battery life by reducing deep discharges, and pays for itself within 1 to 2 years in saved electricity.
This guide covers how solar charging works on golf carts, what components you need, the best kits for 36V and 48V systems, and a step-by-step installation walkthrough. Whether you drive a Club Car, EZGO, Yamaha, or any other electric cart, solar panels are a straightforward bolt-on upgrade.
Range Added 5 to 12 miles/day
Kit Cost $100 to $400+
Install Time 1 to 3 hours
Panel Life 20 to 25 years
Golf Cart Solar Panel Roof Kit Checklist
Use this before buying a solar panel for a golf cart roof.
| Decision | Best starting point | Why it matters |
|---|---|---|
| Light daily use | 100W to 160W flexible roof panel | Simple top-off setup for neighborhoods and golf communities |
| More daily driving | 260W to 400W roof setup | Adds more energy but needs roof space and clean wiring |
| 36V cart | Controller must explicitly support 36V output | Many inexpensive solar controllers are not golf-cart boost controllers |
| 48V cart | 48V boost MPPT controller | Standard 12V PWM controllers will not charge a 48V pack correctly |
| Lithium cart | Match controller settings to BMS and battery voltage | Lithium packs need the right charge profile and voltage limits |
| Curved canopy | Flexible panel | Easier to mount without custom brackets |
| Flat rack or hard roof | Flexible or rigid panel | Rigid panels last longer but add more weight and wind load |
The safest answer is to buy the solar panel, charge controller, wiring, and mounting hardware as a golf-cart-specific kit. Piecing together a home solar panel, RV controller, and random battery leads creates avoidable voltage and safety problems.
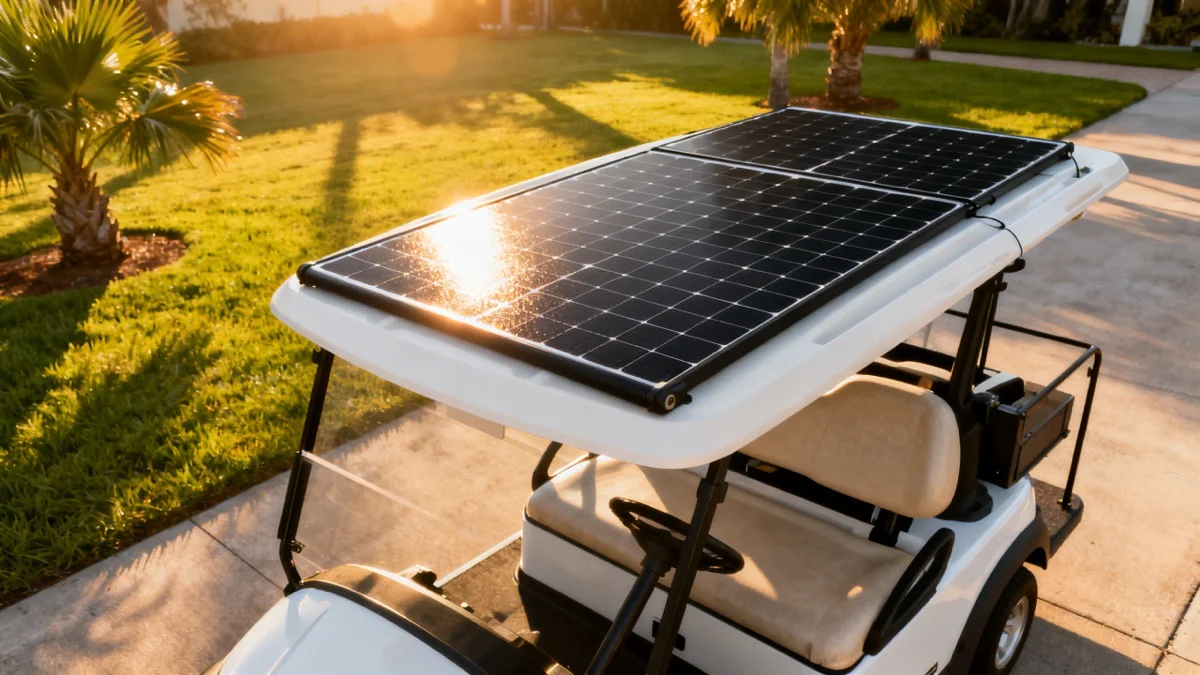
How Golf Cart Solar Panels Work
The concept is simple: solar panels on the roof generate electricity from sunlight, a charge controller regulates that power, and the energy flows into your golf cart's battery pack. The system charges your batteries whether the cart is parked in the sun or rolling down the road.
Here is the basic flow:
- Solar panels absorb sunlight and convert it to DC electricity (typically 12V to 24V output)
- MPPT charge controller boosts that voltage to match your battery system (36V or 48V)
- Wiring carries the regulated power from the controller to your battery bank
- Batteries store the energy for use when you drive
The charge controller is the critical piece. Golf cart batteries run at 36V or 48V, but most solar panels output only 12V to 24V. An MPPT (Maximum Power Point Tracking) boost controller solves this mismatch by stepping up the voltage with 90 to 95% efficiency. A standard PWM controller from a home solar setup will not work here.
For a deeper look at battery systems and voltage, see our complete battery guide.
How Much Range Do Solar Panels Actually Add?
This is the first question every golf cart owner asks, and the answer depends on panel wattage, sun hours, and how much energy your cart uses per mile.
Energy math (simplified):
- Golf carts use roughly 60 to 110 watt-hours per mile on flat ground
- A 130W panel produces about 520 to 650 watt-hours on a sunny day (4 to 5 sun hours)
- That equals about 5 to 10 miles of added range per day
| Panel Setup | Daily Output (4-5 sun hours) | Range Added | Best For |
|---|---|---|---|
| 80 to 100W (single panel) | 320 to 500 Wh | 3 to 5 miles | Light daily use, battery maintenance |
| 130 to 160W (single panel) | 520 to 800 Wh | 5 to 8 miles | Moderate daily driving |
| 200 to 280W (dual panel) | 800 to 1,120 Wh | 8 to 12 miles | Heavy daily use, max range |
| 400W+ (multi-panel) | 1,600+ Wh | 12 to 20 miles | All-day driving, off-grid properties |
Real-world context: If your cart gets 25 to 40 miles per charge on a full battery, a 130W solar panel adds roughly 15 to 25% more daily range. On a cart you drive 5 to 10 miles per day around a neighborhood or retirement community, that panel could eliminate the need to plug in entirely.
Are Solar Panels Worth It for Your Golf Cart?
The honest answer: for most electric golf cart owners who drive daily, yes. Here is the breakdown.
When Solar Panels Make Sense
- Daily short trips (5 to 15 miles). If you drive around a neighborhood, retirement community like The Villages, or golf course daily, solar can handle most or all of your charging needs.
- Extending battery life. Solar keeps batteries topped off, preventing the deep discharges that kill lead-acid batteries prematurely. This alone can add 1 to 2 years of battery life, saving $800 to $1,500 in replacement costs.
- Off-grid properties. If your cart lives at a hunting cabin, farm, or remote property without reliable power, solar is the only way to keep it charged. Our hunting and off-road guide covers this use case in detail.
- Reducing electricity costs. Charging a golf cart costs $15 to $30 per month depending on usage and local electricity rates. A solar panel cuts that to near zero.
- Sunny climates. Florida, Arizona, Texas, South Carolina, and the Southwest get 5 to 6 sun hours per day, making solar panels highly effective. Check your area's average sun hours for a realistic estimate.
When Solar Panels May Not Be Worth It
- You rarely drive the cart. If the cart sits unused most of the week, a simple trickle charger does the same job for $20.
- Heavily shaded parking. If your cart is always parked under a carport, tree canopy, or inside a garage, the panels will not get enough sun to justify the cost.
- Consistently cloudy climate. In the Pacific Northwest or similar overcast regions, panel output drops to 10 to 25% of rated capacity.
- You need a full charge daily. If you drive 30+ miles per day, solar alone cannot keep up. You will still need to plug in regularly.
Payback Period
A $150 to $300 solar kit saves $15 to $30 per month in electricity and extends battery life by 1 to 2 years ($800 to $1,500 saved). Most owners see a full payback within 6 to 18 months, with 15 to 20+ years of free power after that.
What You Need: Solar Panel System Components
A complete golf cart solar system has four parts. Most kits bundle everything together, but here is what each piece does.
Solar Panels: Rigid vs Flexible
Flexible panels are the most popular choice for golf carts. They weigh 60 to 70% less than rigid panels (3 to 5 lbs vs 10 to 15 lbs), bend to conform to curved roofs, and mount with adhesive or snaps. The trade-off is slightly lower efficiency and a shorter lifespan (15 to 20 years vs 25 years for rigid).
Rigid panels are more durable and efficient, but they require a flat mounting surface and add significant weight to the roof. They work best on carts with flat roofs or custom rack mounts.
For most golf cart owners, flexible panels are the better choice. They fit the roof shape, install faster, and produce nearly the same output.
MPPT Charge Controller
The charge controller is the brain of the system. It regulates voltage and current to protect your batteries from overcharging.
MPPT vs PWM: Always choose MPPT for golf carts. MPPT controllers are 20 to 30% more efficient than PWM controllers, and they boost lower-voltage panel output (12V to 24V) up to your battery system voltage (36V or 48V). PWM controllers cannot do this voltage boost, which means they simply will not work with most golf cart battery configurations.
Look for a controller rated for your specific voltage (36V or 48V) with at least 10A capacity. Most golf cart solar kits include the correct MPPT controller.
Wiring and Connectors
Solar kits come with MC4 connectors (the standard for solar), battery terminal cables, and extension wiring. You will also need basic hand tools (screwdriver, wire strippers, zip ties) for installation. If your kit does not include fuses, add an inline fuse between the controller and battery bank for safety.
Mounting Hardware
Flexible panels mount with industrial adhesive tape, snap fasteners, or Velcro strips. Rigid panels use aluminum brackets bolted to the roof frame. Most kits include the mounting hardware specific to the panel type.
Best Golf Cart Solar Panel Kits for 2026
These are the top picks based on output, build quality, compatibility, and value.
Best Overall: ECO-WORTHY 130W Flexible Kit
The ECO-WORTHY 130W kit is the best balance of price, output, and ease of installation for most golf cart owners. The flexible panel conforms to curved roofs, and the included MPPT boost controller handles 48V, 60V, and 72V systems.
- Wattage: 130W
- Daily output: About 520 Wh (4 to 5 sun hours)
- Range added: 5 to 8 miles per day
- Controller: MPPT boost (up to 95% efficiency)
- Compatibility: 48V/60V/72V systems
- Weight: About 3.5 lbs (panel only)
- Price: Around $120 to $160
The semi-flexible design is 70% lighter than glass panels. It includes the panel, MPPT controller, MC4 cables, and mounting hardware.
Check Price on AmazonBest High-Output: TXL 280W Dual Panel Kit
For maximum range extension, the TXL 280W kit uses two 140W flexible panels with a combined output of about 1,120 Wh per day. That translates to 10 to 15 miles of added range in good sun.
- Wattage: 280W (2 x 140W panels)
- Daily output: About 1,120 Wh
- Range added: 10 to 15 miles per day
- Controller: MPPT boost (48V/60V/72V)
- Weight: About 7 lbs total
- Price: Around $250 to $350
The dual-panel design covers more of the roof and is ideal for carts driven 15+ miles per day.
Check Price on AmazonBest Rigid 48V Kit: Tektrum 160W Kit
Tektrum has been making golf cart solar kits longer than almost anyone. Their 160W 48V kit uses four 40W rigid panels, a charge controller, and complete mounting hardware. It is a proven, reliable system at a competitive price.
- Wattage: 160W (4 x 40W rigid panels)
- Daily output: About 640 Wh
- Range added: 6 to 8 miles per day
- Controller: Included (PWM style)
- Compatibility: 48V systems (also available in 36V)
- Price: Around $870 direct when checked in May 2026; marketplace pricing can vary
The rigid panels are heavier than flexible alternatives, but they are more durable and have a longer track record. Tektrum lists the kit as a 160W, 48V golf cart charger with four 40W panels, controller, MC4 cables, mounting brackets, and fitment for brands such as EZGO, Yamaha, Club Car, Star, Tomberlin E-Merge, Bad Boy Buggie, and Fairplay.
Check Price on AmazonBest Premium: PowerFilm PowerDrive
PowerFilm makes the only solar panels custom-designed for specific golf cart models. Their PowerDrive panels are thin, lightweight, and contoured to fit the exact roof shape of EZGO TXT, EZGO RXV, and Club Car Precedent carts. Made in the USA.
- Wattage: 150 to 165W (model-specific)
- Controller: Included (MPPT)
- Compatibility: 36V and 48V (both lead-acid and lithium)
- Price: $500 to $800+
The higher price buys a factory-fit panel that looks integrated rather than bolted on. It is the best option if aesthetics matter or you want a plug-and-play install with zero guesswork.
Solar Panel Kit Comparison Table
| Kit | Wattage | Daily Range Added | Panel Type | Voltage | Price |
|---|---|---|---|---|---|
| ECO-WORTHY | 130W | 5 to 8 mi | Flexible | 48V/60V/72V | $120 to $160 |
| TXL Dual | 280W | 10 to 15 mi | Flexible | 48V/60V/72V | $250 to $350 |
| Tektrum | 160W | 6 to 8 mi | Rigid | 36V or 48V | ~$870 direct |
| PowerFilm | 150 to 165W | 6 to 8 mi | Custom flex | 36V/48V | $500 to $800+ |
How to Install Golf Cart Solar Panels: Step by Step
Most golf cart solar kits install in 1 to 3 hours with basic hand tools. Here is the process.
Step 1: Check Your Battery Voltage
Before buying anything, confirm whether your cart runs a 36V or 48V system. Count the batteries and multiply by their individual voltage:
- 36V system: Six 6V batteries or three 12V batteries
- 48V system: Six 8V batteries, four 12V batteries, or one 48V lithium pack
Your battery guide has detailed instructions for identifying your system. The charge controller must match this voltage.
Step 2: Choose Your Panel Size
Match panel wattage to your daily driving needs:
- Under 5 miles/day: 80 to 130W is plenty
- 5 to 15 miles/day: 130 to 200W for reliable daily top-off
- 15+ miles/day: 280W+ for maximum range extension
Also measure your roof. Most golf cart roofs fit one or two panels comfortably. Standard panel sizes run about 45 x 20 inches for a 130W flexible panel.
Step 3: Mount the Panels to the Roof
For flexible panels: Clean the roof surface with rubbing alcohol. Apply industrial adhesive tape or snap fasteners according to the kit instructions. Press firmly and allow the adhesive to cure for 24 hours before driving.
For rigid panels: Attach the aluminum mounting brackets to the roof frame using the provided bolts. Secure the panels to the brackets. Make sure the panels are angled slightly (5 to 10 degrees) to allow rainwater to run off.
Route the panel cables along the roof support posts and down to where you will mount the charge controller. Use zip ties to secure cables and prevent them from dangling near the wheels or drivetrain.
Step 4: Mount the Charge Controller
Mount the MPPT controller in a protected, ventilated location. Under the seat or on the frame near the battery compartment works well. Avoid locations where water can collect or where the controller will be exposed to direct rain.
Step 5: Wire the System
Wiring order matters. Always connect in this sequence to avoid damage:
- Battery first: Connect the controller's battery output terminals to your battery bank (positive to positive, negative to negative)
- Solar panel second: Connect the panel's MC4 cables to the controller's solar input terminals
- Verify polarity: Double-check that positive and negative are correct on both connections
If your kit does not include an inline fuse, add a 15 to 20A fuse between the controller and battery bank. This protects the system if a short occurs.
Step 6: Test the System
With the panels in sunlight, check the charge controller display. It should show:
- Input voltage from the panels (typically 18 to 24V)
- Output voltage matching your battery system (36V or 48V)
- Charging current (typically 2 to 8 amps depending on panel wattage and sun intensity)
If the controller shows no charging current, verify all connections and check that the panels are receiving direct sunlight (not shaded by the roof frame).
36V vs 48V Systems: Solar Compatibility
Both 36V and 48V golf cart systems work with solar panels, but there are differences worth knowing.
48V systems are more common in newer carts and work with the widest selection of solar kits. Most MPPT boost controllers are designed primarily for 48V, with 36V as a secondary option. If you are buying a new cart or upgrading, 48V gives you more solar kit choices.
36V systems are found in older EZGO and Club Car models. Fewer solar kits specifically target 36V, but Tektrum and several other brands offer 36V-specific kits. Make sure the charge controller explicitly supports 36V before purchasing.
If you are considering upgrading from 36V to 48V, our lithium battery conversion guide covers the process. A lithium upgrade paired with solar panels is one of the best performance investments you can make.
Solar Panels with Lithium vs Lead-Acid Batteries
Solar panels work with both battery types, but lithium batteries pair better with solar for several reasons.
Lithium batteries accept charge more efficiently, charge faster, and handle partial charge states without degradation. A lithium pack charges to 90% capacity quickly, and solar can top off the remaining 10% through the day. Lithium also weighs 60 to 70% less, which improves the overall efficiency of your cart. If you are running a lithium system, the EXEFCH 48V 105Ah lithium battery pairs well with any of the solar kits above.
Check Price on AmazonLead-acid batteries benefit from solar too, especially in terms of longevity. Lead-acid batteries degrade fastest when they sit at low charge levels. Solar panels prevent this by maintaining a constant trickle charge. The trade-off is that lead-acid charges more slowly and loses some energy to heat during charging.
For either battery type, make sure your regular plug-in charger is still available as a backup. Solar supplements your charging; it does not replace it entirely.
Maximizing Solar Panel Performance
A few simple practices will help you get the most out of your solar setup.
Park in direct sunlight. This sounds obvious, but it is the single biggest factor. A panel in full sun produces 5 to 10 times more power than one in partial shade. If your usual parking spot is shaded, move the cart into the sun when you are not driving.
Keep panels clean. Dust, pollen, bird droppings, and tree sap reduce output by 10 to 25%. Wipe panels down with a soft cloth and water every few weeks. Avoid abrasive cleaners or pressure washers.
Check wiring connections quarterly. Vibration from driving can loosen terminals over time. Inspect the controller, battery, and panel connections every few months. Look for corrosion, frayed wires, or loose fittings.
Monitor charge controller readings. Most MPPT controllers have an LED display showing voltage, current, and charging status. A sudden drop in output usually means a dirty panel, loose connection, or shading issue.
Pair with a lithium upgrade for best results. Lithium batteries and solar panels are a natural combination. Lithium charges faster, accepts partial charges without damage, and delivers more consistent power. See our battery guide for the full comparison.
Common Questions About Solar Panel Installation
Will solar panels void my golf cart warranty?
In most cases, no. Solar panels connect to the battery bank through an external charge controller, not to the cart's factory wiring or motor controller. Bolt-on accessories like solar kits, LED lights, and mirrors generally do not affect warranty coverage. That said, check with your manufacturer if you are concerned.
Can I add solar panels to a gas golf cart?
No. Gas golf carts do not have a battery pack to charge (they use a small 12V starter battery, not a traction battery). Solar panels are only practical on electric golf carts. If you are deciding between electric and gas, our comparison guide covers the trade-offs.
Do I need to disconnect solar panels for winter?
If you winterize your cart and store it for months, you can leave the solar panels connected. They will provide a maintenance trickle charge that keeps your batteries healthy during storage. This is actually one of the best uses for solar panels: preventing battery sulfation during long periods of inactivity.
How do solar panels handle rain and weather?
All reputable golf cart solar panels are rated IP65 or higher, meaning they are fully waterproof. Rain, morning dew, and sprinkler spray will not damage them. Flexible panels are also tested for hail resistance up to 1 inch diameter. If your cart lives outdoors, a storage cover protects the rest of the cart while leaving the roof panels exposed to charge.
Can I use a regular home solar panel on my golf cart?
Technically yes, but it is not ideal. Home solar panels are rigid, heavy (30 to 40 lbs for a 300W panel), and sized for rooftops, not golf cart canopies. They also output 30V to 40V, which requires a different charge controller configuration. Golf cart-specific kits are lighter, properly sized, and come with the right controller.
Where Solar Works Best: Location Matters
Your geographic location directly affects how much range solar panels add. Here are average sun hours per day for the top golf cart states:
| State | Avg. Sun Hours/Day | Solar Effectiveness |
|---|---|---|
| Arizona | 6.5 | Excellent |
| Florida | 5.5 | Excellent |
| Texas | 5.5 | Excellent |
| South Carolina | 5.0 | Very good |
| California | 5.5 | Excellent |
| Georgia | 5.0 | Very good |
| North Carolina | 4.5 | Good |
| Ohio | 3.5 | Fair |
| Washington | 3.0 | Below average |
Multiply your panel wattage by your area's sun hours to estimate daily output. A 130W panel in Florida (5.5 hours) produces about 715 Wh per day. The same panel in Ohio (3.5 hours) produces about 455 Wh.
Frequently Asked Questions
How long do golf cart solar panels last?
Quality solar panels degrade at about 0.5% per year. After 20 years, a panel still produces roughly 90% of its original output. The charge controller may need replacement after 10 to 15 years. This makes solar one of the longest-lasting upgrades you can add to a golf cart.
Can I run multiple panels in series or parallel?
Yes. Running panels in series increases voltage (useful for some controller setups), while parallel increases current (useful for maximizing output). Most dual-panel kits are pre-wired for the optimal configuration. Check your charge controller's maximum input voltage and current ratings before adding extra panels.
Do solar panels add weight that affects performance?
A single flexible panel weighs 3 to 5 lbs. Even a full 280W dual-panel setup adds only 7 to 10 lbs to the roof. For context, a standard golf cart weighs 800 to 1,100 lbs. The weight impact on performance, speed, and range is negligible.
What happens on cloudy or rainy days?
Solar panels still produce power on overcast days, but output drops to 10 to 25% of full-sun capacity. A 130W panel might only produce 50 to 130 Wh on a cloudy day (1 to 2 miles of range). This is why keeping your plug-in charger as a backup is important.
Can solar panels cause battery overcharging?
Not with a proper charge controller. The MPPT controller monitors battery voltage and automatically stops charging when the batteries are full. This is the same principle as the plug-in charger that came with your cart. Without a controller, direct panel-to-battery connections can overcharge, which is why you should never skip the controller.
Browse golf carts from local dealers to find models that come with solar-ready roofs, or check our complete accessories guide for more upgrade ideas. For the full rundown on golf cart customization options, including solar, see our mods guide.
Golf Cart Search
Find the Best Golf Carts of 2026
Compare top-rated models, read expert reviews, and find the perfect cart for your needs.