As an Amazon Associate, we earn from qualifying purchases. This helps support our site at no extra cost to you.
A golf cart mirror shaking on every bump needs a check at four places: the mirror head, folding pivot, bracket and supporting strut or roof. Find which connection moves before buying a replacement. Tightening the visible nut harder is the wrong first move when the bracket is slipping or the mounting surface is cracked.
Start with the cart parked securely on level ground, following its parking and shutdown instructions. Keep the key off during the inspection. This guide covers external inspection and fit checks; a damaged support or a signal mirror with damaged wiring belongs with a repair shop.
Golf cart mirror shaking: locate the moving part
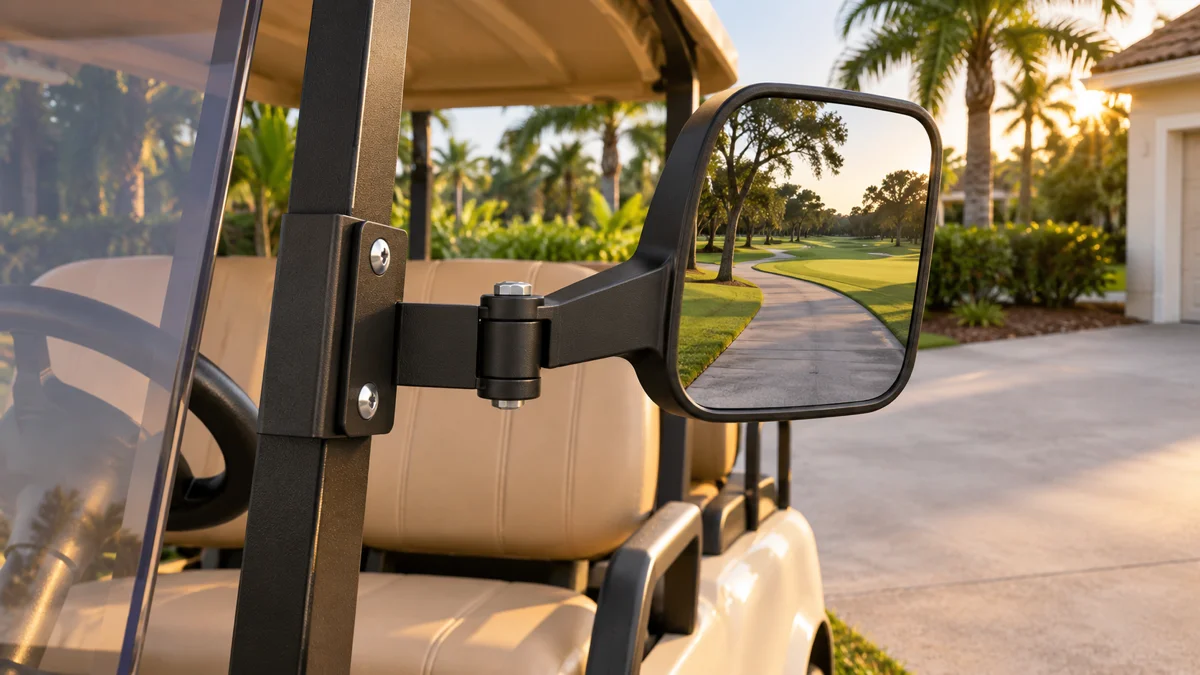
Look at the mirror assembly as a chain of connections. The glass sits in a head, the head joins an arm or adjustment joint, and a bracket connects that assembly to the cart. A center mirror adds the canopy or roof bracket to that chain.
Gently check the assembly without forcing the glass or folding mechanism. Watch where movement starts relative to the next stationary piece. A helper can observe from outside while you check the view from the normal driving position, with the cart remaining parked.
| What you observe | Connection to inspect | Useful next step |
|---|---|---|
| Head changes angle; bracket stays still | Head adjustment or folding joint | Find the exact mirror instructions |
| Entire mirror slips around a support | Clamp or mounting base | Check shape, size and supplied hardware |
| Bracket moves at its attachment holes | Fastener and mounting surface | Check for missing hardware or damage |
| Mirror moves with canopy or strut | Supporting assembly | Have support attachment and condition inspected |
This separates a view adjustment from a mounting repair. If the mirror points correctly but its bracket moves, re-aiming it only hides the problem until the next bump.
The mirror buying guide covers mirror types and sightlines. For movement at a folding windshield rather than the mirror, use the windshield rattle guide.
Three mounting designs that need different checks
We compared three supplier documents to identify which connection each design uses. The practical result is a mounting map: identify the attachment before choosing a fix.
| Document and part | Attachment described | What to identify on your cart |
|---|---|---|
| Club Car 47577558001 | No-drill clamp; canopy required | Matching support and complete clamp assembly |
| RHOX ACC-1021 | Screws into the front strut | Mounting screws versus adjustment nut |
| GTW 03-035 convex mirror | Model-specific brackets and canopy attachment | Correct bracket, fasteners and mounting surface |
Club Car’s side-mirror page identifies part 47577558001, describes its patented clamp and says a canopy is necessary. A clamp-style mirror should therefore be checked at the clamp-to-support connection as well as at the mirror joint. Confirm application with the dealer using the part number.
The RHOX ACC-1021 instructions, pages 1–2, use a different attachment: mounting screws in the front strut. They distinguish those screws from the mirror’s adjustment nut and warn against overtightening either. They also require windshield placement to be considered when choosing the location.
The GTW 03-035 instructions, pages 1–3, show different mounting arrangements by cart application. The Club Car and Yamaha illustrations use canopy holes and nuts and bolts, while the E-Z-GO TXT/RXV illustration uses self-tapping attachment. The mirror also attaches to a separate bracket. Check the drawing for the actual installation.
These differences explain why a repair tip for a screw-mounted side mirror does not transfer directly to a clamp or canopy-mounted center mirror. Match the part number, bracket and installed surface, including any aftermarket roof.
For vehicle identification, start with our serial number guide. The Club Car, E-Z-GO and Yamaha pages help distinguish the model families before requesting the correct instructions.
Check the head and folding pivot first
A mirror that loses its aim while the arm stays fixed points you toward the head adjustment or pivot. Photograph the joint and locate the supplier’s instructions. Some fasteners secure a bracket; others set adjustment resistance. Treating all of them alike risks damaging the assembly.
Check for a cracked housing, a visibly damaged joint, missing hardware or a head that will not retain its position under the specified adjustment procedure. Replace the damaged component or complete assembly as directed by its maker. Do not glue a folding joint solid or use the glass as a handle to force a stiff pivot.
Set the view from the seated driver’s position after the mechanical issue is corrected. Check both sides and the center mirror individually. A stable mirror aimed at a rear-seat backrest still needs adjustment.
For mirrors with LEDs, watch the cable through the full permitted folding and adjustment movement. Stop if a wire catches, rubs an edge or becomes taut. Our turn signal guide covers the system interface, and the 12V accessory wiring guide explains the supply questions to resolve with an installer.
Check the base without crushing the support
If the whole mirror turns around the support, identify the clamp shape and its specified size range. Measure the actual mounting point. Record square-tube width or round-tube diameter as appropriate, plus the position of any windshield clip or enclosure rail.
A clamp that closes against itself while leaving the mirror loose needs a fit check. Repeatedly tightening it is not a substitute for the correct clamp, liner and hardware. Use the maker’s specified parts arrangement. Do not add stacked washers, glue, tape or a homemade spacer to rescue a mismatched mount.
On screw-mounted installations, inspect the area around the attachment. Missing screws, distorted brackets, rusted hardware or enlarged holes require the correct repair. Do not substitute a longer screw without checking the installation instructions and what sits behind the mounting surface.
The RHOX document specifically tells installers to inspect behind drilling locations and to drill only through the first strut wall for ACC-1021. That is a procedure for that kit, not a reason to drill a loose existing mount again. Have damaged attachment holes assessed before refitting it.
Check clearance with the windshield and any weather enclosure. A mirror installed before either accessory can end up with a new contact point or restricted folding path.
Golf cart mirror shaking with the roof
Watch the support as well as the mirror. If the mirror and mounting surface move together, focus the inspection on the supporting assembly. Photograph the roof bracket, canopy attachment and nearby support connections for the shop.
Look for cracks, missing hardware and movement at connections while the cart is parked. Do not climb on the canopy or loosen roof supports to reproduce the noise. Leave structural repairs and roof removal to an installer working from the correct vehicle and canopy instructions.
A center mirror under an aftermarket extended roof needs the roof’s mounting details as well as the cart model. The tops and canopies guide covers those fit questions. Also record recent roof-rack or cargo changes when describing when the problem began.
If both mirrors shake along with the cart, tell the shop whether there is also steering movement, a new tire issue or another chassis symptom. Use the separate tire pressure guide and steering play guide for those checks. Do not diagnose a suspension fault from a blurred reflection alone.
Inspection tools worth using before buying parts
Use tools you already own where suitable. The useful purchase is the one that fills a specific inspection need, not a new mirror chosen before the mount is identified.
A small light helps reveal a crack or missing fastener beneath a bracket. The Streamlight 66118 Stylus Pro is an optional penlight for that inspection.
Streamlight Stylus Pro penlight →An inspection mirror helps view the back of a mounting plate without removing it. The Ullman C-2 is an optional aid when the attachment is difficult to see; inspect from ground level without reaching into an energized or moving assembly.
Ullman C-2 inspection mirror →A tape measure helps record bracket spacing and mounting position for the supplier. The Stanley 33-425 is one option. Use a caliper if the maker requires a precise tube measurement that a tape cannot resolve.
Stanley 25-foot tape measure →For a replacement quote, ask for the exact mirror, mount, hardware and labor as separate items. A signal-mirror quote should also cover wiring inspection and system testing. Our tool kit guide covers broader maintenance equipment.
Send a repair shop a useful mirror report
A clear report helps the shop choose between adjustment, mount repair and replacement. Record these six details:
- Cart make, model and year or serial number.
- Mirror brand and part number, plus photos of the front and rear of the mount.
- The first joint that moves relative to a stationary part.
- Whether the left mirror, right mirror, center mirror or all of them are affected.
- Recent changes to the windshield, roof, enclosure, mirrors or tires.
- Visible cracks, missing hardware and any cable interference.
For example: “The driver-side head stays aimed, but its entire clamp rotates on the front strut. The passenger mirror stays fixed. The windshield was replaced last week.” This describes the work area much more clearly than “both mirrors are bad.”
Find a golf cart repair shop if the support is damaged, the correct hardware is unclear or the mirror will not hold adjustment. Add the repaired assembly to your regular maintenance inspection.
Before driving, confirm that the corrected mirror holds its intended position, the mount is secure, the view is useful from the seat and all accessories clear one another. Recheck signal operation where fitted. Look directly around the cart before moving, and never reach out to adjust or steady a mirror while driving.
Frequently asked questions
Why is my golf cart mirror shaking?
First locate the movement: mirror head, folding pivot, mounting bracket or roof support. Repair the moving connection under its own instructions before replacing the complete mirror.
Should I tighten the mirror adjustment nut harder?
Use the mirror maker’s adjustment procedure. RHOX ACC-1021 explicitly warns against overtightening both the mounting screws and the adjustment nut.
Can I stop mirror vibration with rubber shims?
Use only the liner or spacer arrangement specified for your exact mount. A loose clamp needs its fit and hardware checked before adding material.
Are no-drill mirrors universal?
No. Club Car part 47577558001 uses a patented clamp attachment and requires a canopy. Confirm the exact cart, support and accessory fit before ordering.
Why does my rear-view mirror shake with the roof?
Its mounting surface is moving too. Inspect the mirror bracket and supporting canopy assembly separately; a new mirror head will not repair a loose roof support.
Does a mirror with turn signals need extra checks?
Yes. Check the cable through folding and adjustment movement for rubbing, pinching or tension. Have damaged wiring and the signal interface repaired before use.
What information should I send a repair shop?
Send the cart model and year, mirror part number, mount photos, the joint that moves, recent accessory changes and whether one or both mirrors shake.
Can I keep driving with a loose golf cart mirror?
Repair a loose mount, cracked housing or unusable view before driving. Do not hold or adjust a mirror while the cart is moving.
Golf Cart Search
Find the Best Golf Carts of 2026
Compare top-rated models, read expert reviews, and find the perfect cart for your needs.