As an Amazon Associate, we earn from qualifying purchases. This helps support our site at no extra cost to you.
How to Clean a Golf Cart: Wash, Seats & Batteries
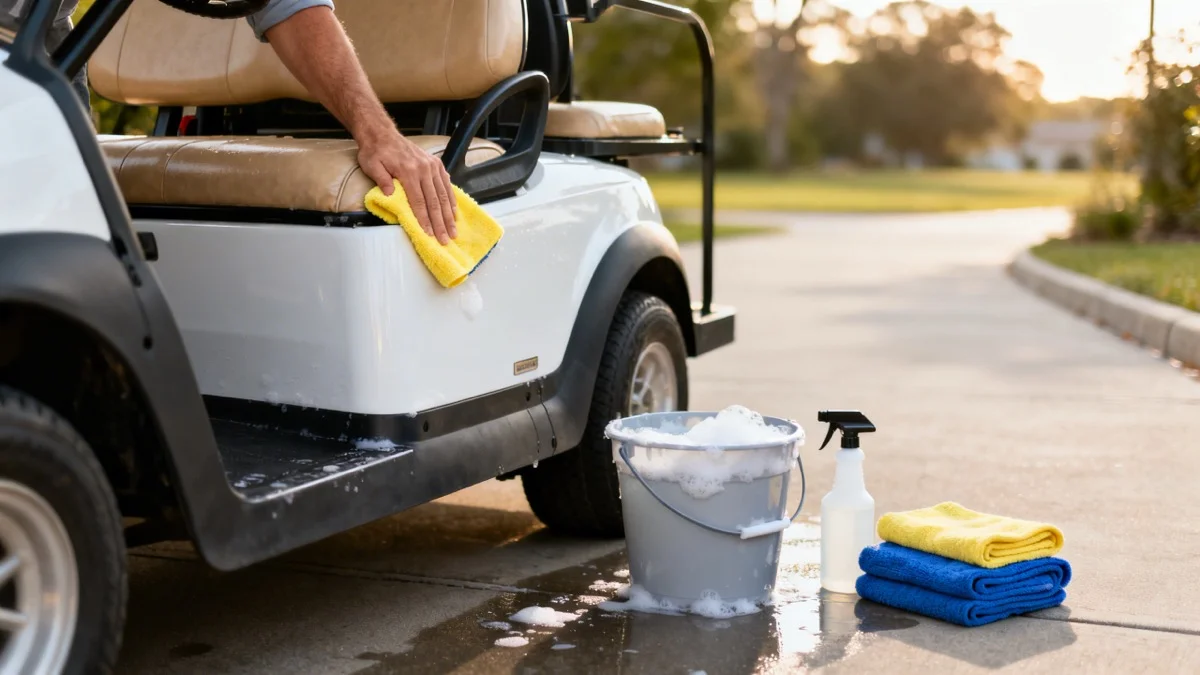
Quick Answer: Golf Cart Cleaning Steps
To clean a golf cart safely, park in the shade, rinse loose dirt with a garden hose, wash the roof and body with automotive soap, clean vinyl seats with mild soap or interior cleaner, scrub wheels and tires, wipe the battery area carefully, dry everything with microfiber towels, then protect the paint, vinyl, and plastic. Do not pressure wash the cart or spray the motor, controller, charger port, or battery connections directly.
A clean golf cart runs better, lasts longer, and holds its value. But most owners either skip cleaning altogether or do it wrong, blasting their cart with a pressure washer and wondering why the electrical system acts up a week later.
Golf carts are not cars. The open design, exposed batteries, and vinyl seats need a different approach. This guide walks you through the right way to clean every part of your cart, from the roof to the tires, with product recommendations that actually work.
The whole process takes about 30 minutes for a basic wash or 60 to 90 minutes for a full detail.
Golf Cart Cleaning Checklist
Use this quick checklist before you start the detailed steps:
| Area | What to use | What to avoid |
|---|---|---|
| Body and roof | Automotive wash soap, microfiber mitt, garden hose | Dish soap on paint, pressure washer, abrasive pads |
| Vinyl seats | Mild soap or interior cleaner, microfiber towel, UV protectant | Bleach, ammonia, harsh degreasers |
| Windshield | Plastic-safe cleaner, microfiber cloth | Paper towels, ammonia glass cleaner on acrylic |
| Wheels and tires | Soft or medium brush, wheel cleaner, tire shine | Metal brushes, slippery tire dressing on turf |
| Battery area | Baking soda solution, old toothbrush, damp cloth | Flooding with a hose, spraying electronics |
| Dashboard and trim | Interior cleaner sprayed on a cloth | Spraying directly into switches or gauges |
For a basic wash, plan on 20 to 30 minutes. For a full detail with seats, tires, battery area, and wax, plan on 60 to 90 minutes.
What You Need Before You Start
Gather everything first so you're not running back to the garage mid-wash. Here's the full supply list:
Cleaning essentials:
- Two buckets (one soapy, one clean rinse water)
- Garden hose with adjustable spray nozzle
- Automotive car wash soap (not dish soap for painted surfaces)
- 3 to 4 microfiber cloths or wash mitts
- Soft-bristle brush (for wheels and textured surfaces)
- Old toothbrush (for battery terminals and tight spots)
Protection and finishing:
- Vinyl/plastic UV protectant (like 303 Aerospace Protectant)
- Tire shine gel or spray
- Automotive spray wax (for painted surfaces)
- Baking soda (for battery terminal cleaning)
Optional but helpful:
- Glass cleaner (for windshield)
- Wheel cleaner or degreaser
- Spray bottle with white vinegar solution (for mold)
- Compressed air (for blowing water out of crevices)
The Meguiar's kit includes car wash soap, a microfiber wash mitt, three microfiber towels, and a drying towel. It's a solid starter kit for $25 to $35 if you don't already own wash supplies.
Step 1: Rinse Off Loose Dirt
Park your cart on a flat surface with good drainage, ideally in the shade. Direct sunlight dries soap before you can rinse it, leaving spots and streaks.
Start from the top and work down. Use a garden hose to spray off loose dirt, grass clippings, leaves, and dust. Pay extra attention to the wheel wells, underside of the roof, and the area around the battery compartment.
For electric golf carts, avoid spraying water directly into the motor compartment, controller, or charger port. These components are water-resistant but not waterproof. A gentle hose spray from a distance is fine for the exterior, but keep the concentrated stream away from electronics.
Step 2: Wash the Body and Roof
Fill one bucket with warm water and automotive car wash soap. Fill the second bucket with clean water for rinsing your mitt.
Using a microfiber wash mitt, wash the roof first, then the body panels, working top to bottom. Dip the mitt in the soapy bucket, wash a section, then rinse the mitt in the clean bucket before reloading with soap. This two-bucket method keeps grit from scratching your paint.
For painted or wrapped carts, use a pH-neutral automotive soap. Dish soap strips wax and can dull the finish over time. A dedicated car wash soap cleans without removing protective coatings.
Stubborn spots like tree sap, bird droppings, and bug splatter need a bit more attention. Let the soapy water soak on the spot for a minute before wiping. For dried-on tree sap, a small amount of rubbing alcohol on a microfiber cloth works without damaging paint.
Rinse the entire body thoroughly with clean water. Any soap residue left behind will leave white streaks.
Step 3: Clean the Vinyl Seats
Golf cart seats take a beating. Sun, rain, sweat, sunscreen, and the occasional spilled drink all degrade vinyl over time. Regular cleaning and protection keeps seats looking good and prevents the cracking that makes a cart look old.
Routine Seat Cleaning
Mix a few drops of dish soap into a bucket of warm water. Dip a microfiber cloth, wring it out so it's damp (not dripping), and wipe down all seat surfaces. Flip the cloth frequently so you're always working with a clean side.
For deeper cleaning, an all-in-one interior cleaner saves time by combining cleaning and light protection in one step.
Chemical Guys Total Interior Cleaner (16 oz)Spray directly onto the seat, wipe with a microfiber cloth, and flip to buff dry. It works on vinyl, plastic, and rubber without leaving a greasy residue.
Removing Mold and Mildew from Seats
Mold is common on golf carts stored outdoors or in humid climates. Those green or black spots on your seats are not just ugly. They smell, and they spread.
To remove mold:
- Mix one cup of white vinegar with one cup of warm water in a spray bottle.
- Spray the affected areas generously.
- Let it sit for 10 to 15 minutes.
- Scrub with a soft brush in circular motions.
- Wipe clean with a damp microfiber cloth.
- Dry the seats completely with a clean towel.
For severe mold, use a dedicated mold and mildew remover. Avoid bleach on vinyl seats. While bleach kills mold, it also dries out vinyl and can cause discoloration and cracking with repeated use.
Protecting Seats from UV Damage
After cleaning, apply a UV protectant. This is the single most important step for extending seat life. Sun exposure causes vinyl to fade, stiffen, and crack, and a good protectant blocks UV rays while keeping the vinyl flexible.
303 Aerospace Protectant (16 oz)303 Aerospace Protectant is the gold standard for vinyl and plastic protection. Spray it on, wipe it in with a microfiber cloth, and let it dry to a matte finish. No greasy residue, no slippery seats. Apply every 4 to 6 weeks for year-round protection.
When you're not using the cart, a breathable golf cart cover provides an extra layer of UV and moisture defense.
Step 4: Dashboard and Plastic Trim
The dashboard, steering wheel, cup holders, and other plastic components collect dust, grime, and sunscreen residue. The same interior cleaner you used on the seats works here.
Spray the cleaner onto a microfiber cloth (not directly onto the dashboard) to avoid overspray into gauges or the stereo system. Wipe all plastic surfaces, getting into the grooves and seams where dirt hides. An old toothbrush works well for textured plastic surfaces and tight corners around buttons and switches.
For the steering wheel, clean it thoroughly. Sunscreen, sweat, and dirt build up on the grip area and make the wheel slick. A clean steering wheel is also a safety consideration.
After cleaning, apply UV protectant to the dashboard and all exposed plastic trim. These surfaces fade and crack from sun exposure just like the seats.
Step 5: Clean the Wheels and Tires
Dirty wheels are the fastest way to make a clean cart look neglected. Golf cart tires pick up grass stains, mud, brake dust, and road grime that regular soap alone won't remove.
Washing the Wheels
Use a wheel-specific cleaner or an all-purpose degreaser sprayed onto the wheels. Let it sit for 2 to 3 minutes to break down brake dust and grime. Scrub with a stiff-bristle brush (not metal, which scratches), paying attention to the lug nut area and inner barrel of the rim.
For chrome or aluminum wheels, use a non-acidic wheel cleaner to avoid etching or pitting the finish. Rinse thoroughly.
Tire Cleaning and Shine
Scrub the tire sidewalls with the stiff brush and soapy water to remove embedded dirt. Brown tires are not a sign of age. That discoloration is antiozonant compound that migrates to the surface. A good scrub removes it and reveals the original black underneath.
Once dry, apply a tire shine product for that deep black, like-new look.
Car Guys Tire Shine Gel with ApplicatorGel-based tire shine lasts 2 to 4 weeks compared to 3 to 7 days for spray-on products. Apply with the included applicator pad in thin, even coats. Let it dry for 5 minutes before driving to prevent sling-off.
Golf course note: If you drive on a golf course, avoid silicone-based tire products that can leave marks on greens and cart paths. Water-based formulas are safer for turf.
Step 6: Battery Compartment and Electrical Area
The battery compartment is the most neglected part of most golf carts, and it's the area where proper cleaning matters most for performance and longevity. Corroded terminals reduce power delivery and can leave you stranded.
Cleaning Battery Terminals
For lead-acid batteries:
- Safety first. Wear gloves and safety glasses. Battery acid is corrosive.
- Disconnect the negative terminal on each battery before cleaning.
- Mix the cleaning solution: Two tablespoons of baking soda in one cup of water.
- Apply with an old toothbrush. Scrub each terminal and cable connector until the corrosion (white or greenish crust) is removed.
- Rinse with a small amount of clean water. Use a spray bottle, not a hose, to control where the water goes.
- Dry everything completely with a clean rag.
- Apply terminal protectant. A thin coat of petroleum jelly or a spray-on terminal protectant prevents future corrosion.
- Reconnect the positive terminal first, then the negative.
For lithium batteries, terminal corrosion is less common, but still check the connections and wipe down the battery cases with a dry cloth.
Cleaning Around the Batteries
Wipe down the battery tray and surrounding area with a damp cloth. Dried battery acid residue (on lead-acid systems) can corrode the metal tray and nearby components. If you see white powdery residue on the tray, that's acid. Clean it with the baking soda solution.
Check for loose wires, cracked insulation, or damaged cables while you're in there. This quick inspection during cleaning can catch problems before they become expensive repairs. If you spot corrosion spreading beyond the terminals to the tray or frame, our rust prevention and corrosion guide covers treatment options and protective coatings.
Step 7: Dry and Protect
Drying matters more than most people think. Water spots form when mineral-rich tap water evaporates on painted surfaces, leaving behind calcium and mineral deposits.
Drying the Cart
Use a large, clean microfiber drying towel. Start with the roof, then work down the body panels. Pat and drag the towel rather than rubbing in circles, which can push grit across the surface.
For hard-to-reach areas (around mirrors, under the canopy edge, inside cup holders), compressed air or a leaf blower on low setting works well to blast out trapped water.
Applying Wax or Sealant
For painted body panels, apply a spray wax or liquid sealant after drying. Wax creates a protective barrier against UV rays, dirt, and moisture, and makes your next wash significantly easier because contaminants slide off the slick surface.
Spray wax is the fastest option. Spray onto one panel at a time, spread with a microfiber cloth, then buff with a clean dry microfiber. The whole cart takes about 10 minutes.
Apply wax to painted surfaces only. Keep it off vinyl seats, textured plastic, and rubber, as it leaves white residue in texture grooves.
What NOT to Do When Cleaning Your Golf Cart
These mistakes are common and can cause real damage:
Do not use a pressure washer. This is worth repeating. Pressure washers force water into electrical connectors, behind seals, and into the motor compartment. Many golf cart owners report their cart won't start after a pressure wash because moisture got into the controller or solenoid. If this happens to you, let the cart dry completely for 24 to 48 hours before trying to start it, or use compressed air to blow out the connections.
Do not use abrasive pads. Steel wool, Scotch-Brite pads, and stiff plastic brushes scratch paint, clear coat, and acrylic windshields. Stick to microfiber cloths and soft-bristle brushes.
Do not use household cleaners. Ammonia-based glass cleaners (like Windex) cloud acrylic windshields permanently. Bleach dries out vinyl. All-purpose household cleaners can strip wax and damage clear coat. Use automotive-grade products.
Do not wash in direct sunlight. Soap dries on hot surfaces before you can rinse it, leaving spots and streaks that are hard to remove. Wash in the shade or during cooler parts of the day.
Do not ignore the undercarriage. Grass clippings, mud, and debris trapped underneath hold moisture against metal parts, accelerating rust and corrosion. Spray the underside with a hose during each wash.
Do not skip drying. Air-drying leaves water spots on painted surfaces and can trap moisture in electrical areas. Always towel dry.
How Often Should You Clean Your Golf Cart?
Your cleaning schedule depends on how and where you use your cart:
| Usage Pattern | Recommended Frequency | Notes |
|---|---|---|
| Golf course only | Monthly | Low exposure to dirt and grime |
| Neighborhood driving | Every 2 to 3 weeks | Road dust, pollen, bird droppings |
| Beach or coastal area | Weekly | Salt air accelerates corrosion |
| Dirt roads, trails, hunting | After every use | Mud and debris damage components if left |
| Stored outdoors | Every 2 weeks | Rain, pollen, tree sap accumulate |
| Garaged, light use | Monthly | Dust and occasional wipe-down |
Between full washes, do a quick 5-minute wipe-down after each ride. Keep a microfiber cloth in the cart to wipe bird droppings, pollen, and dust before they bake on in the sun.
Seasonal Cleaning Calendar
Spring (March through May)
Spring is the most important cleaning season. Your cart has been sitting through winter (or at least through a slower season), and it needs attention before regular use begins.
- Deep clean the entire cart using the steps above
- Remove the golf cart cover and clean underneath it
- Check and clean battery terminals (corrosion builds during storage)
- Apply UV protectant to all vinyl and plastic
- Wax all painted surfaces
- Inspect tires for dry rot and check tire pressure
- Review our spring maintenance checklist for the complete list
Summer (June through August)
Peak usage season means more frequent cleaning.
- Wash every 2 weeks (weekly if near the coast)
- Reapply UV protectant monthly (sun is strongest)
- Clean seats after sunscreen contact (it degrades vinyl)
- Address bird droppings immediately (acidic and stains)
Fall (September through November)
Transition season. Start preparing for winter storage.
- Full detail before storage prep
- Clean and treat all vinyl before winterizing
- Deep clean battery compartment
- Apply heavier coat of protectant (lasts through storage)
Winter (December through February)
If you're in a warm climate and still driving, maintain your regular schedule. If storing the cart:
- One final wash before winter storage
- Cover with a breathable cart cover
- Do not leave the cart uncovered outdoors for months without cleaning
Cleaning Tips by Cart Type
Electric Golf Carts
Electric carts need extra care around the battery compartment and electrical components. Keep the charger port dry during washing by covering it with tape or a plastic bag. After washing, let the cart dry completely before plugging it in to charge.
Pay special attention to the controller area (usually under the seat). Don't spray water in this direction. Wipe it down with a damp cloth instead of spraying.
Gas Golf Carts
Gas carts are slightly more forgiving with water but have their own concerns. Clean the air filter area carefully and avoid soaking it. Wipe down the engine compartment with a damp cloth rather than hosing it down. Check for oil leaks during cleaning and clean up any spills with a degreaser.
Lifted and Customized Carts
Lifted carts with oversized tires collect more mud and debris in the wheel wells and suspension components. The extra ground clearance means more exposed undercarriage to clean. Custom paint jobs and LED lights need careful attention to avoid damage from harsh chemicals or abrasive tools.
Golf Cart Cleaning Products: Our Picks
Here's a quick reference for the products mentioned throughout this guide:
| Product | Best For | Price Range |
|---|---|---|
| Automotive car wash soap | Body panels, roof, overall wash | $8 to $15 |
| Chemical Guys Total Interior | Vinyl seats, dashboard, plastic trim | $8 to $12 |
| 303 Aerospace Protectant | UV protection for vinyl and plastic | $10 to $15 |
| Tire shine gel | Tire sidewalls, rubber trim | $10 to $15 |
| Automotive spray wax | Painted body panels after washing | $8 to $15 |
| Baking soda + water | Battery terminal corrosion | Pennies |
| White vinegar + water | Mold and mildew on seats | Pennies |
You don't need expensive specialty products. A $30 to $60 investment in basic automotive cleaning supplies covers everything for months of regular maintenance.
Frequently Asked Questions
How do you clean a golf cart?
Park in the shade, rinse loose dirt with a garden hose, wash the roof and body with automotive soap and a microfiber mitt, clean vinyl seats with mild soap or interior cleaner, scrub wheels and tires, wipe the battery area carefully, then dry the cart and apply UV protectant or wax where appropriate. Avoid pressure washing and do not spray electrical components directly.
What is the safest way to wash an electric golf cart?
Use a garden hose on a gentle setting, keep the charger port covered, avoid spraying the controller, motor, solenoid, and battery connections directly, and dry the cart fully before charging or driving. Clean the battery compartment with a damp cloth or controlled spray bottle instead of flooding it with water.
What supplies do I need to clean a golf cart?
For a basic golf cart cleaning, use two buckets, automotive wash soap, a garden hose, microfiber towels, a wash mitt, a soft brush, vinyl cleaner or mild soap, tire cleaner, baking soda for battery corrosion, and UV protectant for vinyl and plastic. Add spray wax, glass or plastic-safe windshield cleaner, and a tire shine if you want a full detail.
Can I use dish soap to wash a golf cart?
Dish soap is acceptable for vinyl seats and some interior wipe-downs, but it is not ideal for painted body panels because it can strip wax and dull the finish over time. Use pH-neutral automotive car wash soap for the body, roof, painted panels, and wraps.
Can you take a golf cart through a car wash?
No. Automatic car washes use high-pressure jets and rotating brushes that can damage golf cart bodies, tear off mirrors and accessories, and force water into electrical components. Self-serve pressure wash bays are also risky for the same reasons. Hand-washing at home is the safest method.
How do you clean golf cart floor mats?
Remove the floor mats from the cart and shake off loose dirt. Scrub with soapy water and a stiff brush. For rubber mats, a degreaser works well on stubborn grime. Rinse, let them dry completely in the sun, then reinstall. Cleaning mats separately prevents dirty water from pooling in the cart's footwell.
Does cleaning affect golf cart resale value?
Absolutely. A well-maintained, clean cart sells for 10% to 20% more than an identical neglected one. Cracked, faded seats and corroded battery terminals signal poor maintenance to buyers, even if the mechanical condition is fine. Regular cleaning and UV protection preserve both the appearance and the resale value of your cart.
What about cleaning golf cart enclosures?
Golf cart enclosures need separate care. The clear vinyl windows scratch easily, so use a plastic-safe cleaner and soft cloth (never paper towels). The fabric or vinyl walls can be wiped down with mild soap and water. Let enclosures dry completely before folding or rolling them up to prevent mold growth.
How do you clean aluminum parts on a golf cart?
Aluminum frames, bumpers, and trim oxidize over time, developing a chalky white or dull appearance. Use a dedicated aluminum cleaner or polish, apply with a microfiber cloth, and buff in the direction of the grain. For heavy oxidation, a fine automotive rubbing compound removes the top layer and restores shine. Protect cleaned aluminum with a metal sealant to slow future oxidation.
Should you clean your golf cart before selling it?
Yes. A full detail before listing your cart for sale is one of the highest-ROI investments you can make. Spend 2 hours detailing the cart and you'll likely get hundreds more when you sell. Clean the battery terminals, shine the tires, treat the seats, and wax the body. Take your listing photos immediately after detailing while the cart looks its best. See our golf cart value guide for pricing help.
Golf Cart Search
Find the Best Golf Carts of 2026
Compare top-rated models, read expert reviews, and find the perfect cart for your needs.


