As an Amazon Associate, we earn from qualifying purchases. This helps support our site at no extra cost to you.
Your golf cart has been sitting all winter. Before you roll out for the season, a few hours of prep will save you from dead batteries, flat tires, and surprise breakdowns mid-ride. This 8-step checklist covers what to do, what it costs, and when to call a professional instead.
Whether you own a Club Car, EZGO, Yamaha, or one of the newer brands like ICON or Evolution, the spring process is similar. Electric and gas carts share most steps, with a few key differences we will call out along the way.
If you followed our winterization guide last fall, you are ahead of the game. If you just parked it and walked away, pay extra attention to the battery section below.
Step 1: Battery Inspection and Revival
Batteries are the most expensive component on an electric golf cart, and they are also the most vulnerable to winter damage. This step alone determines whether your season starts smooth or with a $600+ surprise. For a deeper dive on types, lifespans, and costs, see our complete battery guide.
Lead-Acid Battery Checklist
Start with a visual inspection. Look for cracked cases, bulging sides, or any signs of leaking acid. If you see physical damage, that battery needs replacing before you go any further.
Clean the terminals. Three months of sitting produces corrosion, even with a good cover. Mix a tablespoon of baking soda with a cup of water, apply the paste with a wire brush, and scrub each terminal and cable clamp until the metal is clean. Rinse with plain water, dry completely, then spray with an anti-corrosion protectant like CRC Battery Terminal Protector (~$7) → to keep them clean all season.
Charge before adding water. This is the most common mistake people make in spring. Charging causes electrolyte to expand, so if you top off the water first, it will overflow and spill corrosive acid everywhere. Plug in the cart and let it complete a full charge cycle, which takes 8-14 hours after winter storage. Do not interrupt it.
Then check water levels. After charging, open each battery cap and look inside. The electrolyte should cover the plates by about 1/4 inch. If any plates are exposed, add distilled water only. Never use tap water because the minerals destroy battery plates over time. A gallon of distilled water costs $1-2 at any grocery store. For mess-free filling, an auto-shutoff battery filler like the OEMTOOLS Battery Filler (~$13) → prevents overfilling. If you maintain a lead-acid pack all season, read our breakdown of when a golf cart battery watering system is worth it and when it is smarter to stay manual.
Check voltage. Use a multimeter to test each battery individually. Here are the resting voltage targets after a full charge:
| Battery Type | Fully Charged | Needs Charging | Replace |
|---|---|---|---|
| 6V | 6.37V+ | 6.0-6.2V | Below 5.8V |
| 8V | 8.49V+ | 8.0-8.3V | Below 7.8V |
| 12V | 12.73V+ | 12.0-12.4V | Below 11.8V |
If any individual battery cannot reach the "needs charging" range after a full overnight charge, it is dragging down the entire pack. One weak battery hurts the performance and lifespan of all the others.
For the full rested-voltage chart, pack-voltage targets, and hydrometer process, use our golf cart battery voltage chart and test guide.
Lithium Battery Spring Prep
If you have upgraded to lithium (or your cart came with lithium batteries), spring is much simpler. There is no water to check, no terminal corrosion to clean, and no equalization charge needed. Interested in switching? Our lithium conversion guide walks through the full process.
Here is your lithium checklist:
- Check BMS indicators. Most lithium battery packs have LED lights on the battery management system. Green means good. Red or blinking means something needs attention.
- Inspect connections. Make sure all terminals are tight and free of debris.
- Look for physical damage. Check for cracks, dents, or swelling in the battery case.
- Charge fully. Even lithium batteries lose some charge over winter (about 2-3% per month). Plug in and let it top off.
When to Replace Instead of Revive
Lead-acid batteries last 4-6 years with good maintenance. If yours are approaching that age and struggling to hold a charge, spring is the time to replace them rather than nursing them through another season. A full set runs $600-$900 for a 36V system and $800-$1,500 for 48V. See our charger guide to make sure your charger matches any new batteries.
Step 2: Tire Inspection and Inflation
Tires lose pressure over winter, and sitting in one position for months can create flat spots. Grab a tire pressure gauge and check all four tires. For our full breakdown of tire types, sizes, and brands, see the golf cart tires and wheels finder.
Target PSI: Most golf cart tires should be inflated to 18-22 PSI. The exact number is printed on the tire sidewall. A digital gauge like the AstroAI Digital Tire Pressure Gauge (~$10) → reads in 0.1 PSI increments, which is more accurate than pencil-style gauges.
What to look for beyond pressure:
- Dry rot and sidewall cracks. Run your hand along the sidewall. If you feel cracking or see small splits in the rubber, the tire is past its useful life. Dry rot weakens the structure and can cause blowouts.
- Tread depth. Golf cart tires do not have wear indicators like car tires. If the tread is visibly smooth or worn unevenly, it is time for new tires ($30-85 each depending on size and type).
- Flat spots. Press on the tire at the contact patch where it sat all winter. If it feels noticeably harder or flatter than the rest of the tire, drive slowly for the first few rides to let it round out. Persistent flat spots mean the tire needs replacing.
- Wheel lug nuts. Give each one a check with a wrench. Vibration and temperature changes can loosen them over time.
Step 3: Brake System Check
Brakes that sat unused for months can develop surface rust on drums or shoes. This is normal and usually clears up after a few stops, but you should verify everything is working before you need to stop in a hurry. Our safety guide covers brake safety in more detail.
Pedal test. Press the brake pedal firmly. It should feel solid, not spongy or soft. If the pedal sinks slowly toward the floor, you likely have a cable stretch or hydraulic issue (on carts with hydraulic brakes).
Listen for trouble. Roll the cart slowly and apply the brakes. Grinding means metal-on-metal contact, which means your brake shoes or pads are worn through. Squealing may just be surface rust burning off, but if it persists after 5-10 stops, the shoes need inspection.
Check the parking brake. Set it and try to push the cart. It should hold firmly on flat ground. A weak parking brake usually means the cable needs adjustment, a $20-50 fix at a shop.
When to call a professional: If brakes feel soft, make grinding noises, or the pedal travel has increased noticeably since last season, do not risk it. Brake work runs $50-150 at most golf cart shops. Find a repair shop near you to get it inspected before riding.
Step 4: Gas Cart Fuel System
If you drive an electric cart, skip to Step 5. Gas cart owners have extra work because gasoline degrades over winter, even with fuel stabilizer.
Fuel check. If you added fuel stabilizer before storage, the gas should still be usable. Smell it. Fresh gas smells sharp and pungent. Stale gas smells sour or varnish-like. If it smells off, drain the tank and refill with fresh fuel.
If you did not add stabilizer, drain the tank completely. Old gas leaves varnish deposits in the carburetor that restrict fuel flow and cause hard starting. If the cart runs rough after refueling, you may need a carb cleaning ($50-100 at a shop, or about $15 in spray cleaner for DIY).
If the cart starts then dies or only runs with choke, use the golf cart carburetor cleaning and rebuild cost guide before ordering parts.
Replace the fuel filter. These cost $5-10 and take five minutes to swap. A clogged filter starves the engine and causes sputtering under load. Replace it every spring as a habit.
Check the air filter. Pull it out and hold it up to light. If you cannot see light through it, replace it ($8-15 depending on model). EZGO TXT and RXV use different filter sizes, so check your model number.
Spark plug. Pull the plug and inspect the electrode. Tan or light gray coloring is healthy. Black, oily, or heavily worn electrodes mean it is time for a new one ($3-7 for a 2-pack). Gap it to spec per your owner's manual.
Oil change. If you did not change the oil before storage, do it now. Most gas golf carts use 10W-30 motor oil. Drain the old oil, replace the filter if your model has one, and refill. EZGO engines typically take about 1.5 quarts. An oil change costs $5-8 in materials or $75-100 at a shop.
For the full oil, filter, and spark plug sequence by brand, use our gas golf cart tune-up guide before ordering parts.
Step 5: Electrical System and Lights
Rodents love golf cart wiring. Months of sitting in a garage gives them plenty of time to chew through insulation. This step catches problems before they leave you stranded. If your garage setup needs improvement, our garage storage guide covers ventilation, organization, and pest-proofing strategies.
Check all lights. Turn on headlights, taillights, brake lights, and turn signals (if equipped). Replace any burned-out bulbs. If you are considering an upgrade, LED conversions run $30-80 for a full kit and last far longer than incandescent bulbs. Our LED lights guide covers the best options by cart model.
Test the horn. It sounds obvious, but horns stop working from corroded connections more than any other cause. If yours is dead, check the wiring at the horn button and the horn unit itself.
Inspect wiring. Pop the seat up and look under the dash. Check for chewed wires, frayed insulation, or loose connections. Rodent damage is especially common on carts stored in garages or sheds near wooded areas. Repair any damaged wiring before driving.
Charger receptacle. Plug in the charger and verify it engages properly. A dirty or corroded receptacle can prevent charging. Clean the contacts with electrical contact cleaner if needed.
If you are working toward making your cart street legal, spring is a good time to verify that all required lights and signals are functioning before you hit public roads.
Step 6: Deep Clean and Protect
Winter leaves dust, pollen, mildew, and sometimes critter evidence all over your cart. A proper spring cleaning is not just cosmetic. UV protectant on vinyl and plastic prevents cracking and fading that shortens the life of your seats, dash, and body panels.
Body, Frame, and Underbody
Wash the entire cart with mild automotive soap and water. Pay attention to the undercarriage where road salt, dirt, and debris collect. If you spot any paint chips or surface rust on the frame, touch them up with matching paint or a rust converter to stop it from spreading.
For fiberglass bodies (common on Club Car and EZGO), apply automotive wax after washing to protect the finish. For plastic body panels (Yamaha Drive2, most newer models), skip the wax and use a plastic protectant instead.
Seats and Vinyl Care
Mildew is the biggest seat problem after winter storage. If you see dark spots or smell mustiness, wipe down all vinyl surfaces with a 50/50 mix of white vinegar and water. Let it sit for a few minutes, then wipe clean.
After cleaning, apply a UV protectant like 303 Aerospace Protectant (~$17) → to all vinyl, plastic, and rubber surfaces. It creates a matte, non-greasy barrier against UV damage and keeps seats from drying out and cracking through summer. One application lasts about a month, so reapply periodically throughout the season.
If your seats are already cracked or faded beyond saving, check our seat cover guide for replacement options starting around $30.
Windshield Cleaning
Golf cart windshields are acrylic or polycarbonate, not glass. Do not use Windex or ammonia-based cleaners. They cause hazing and micro-cracks over time. Use a plastic-safe cleaner like Invisible Glass Clear Plastic Cleaner (~$10) →, which is specifically designed for golf cart windshields. It cleans, reduces static cling (so less dust sticks), and will not scratch. For more windshield options and fold-down vs. fixed comparisons, see our windshield guide.
Step 7: Lubrication and Moving Parts
Moving parts that sit idle develop friction. A few minutes with a can of white lithium grease or silicone spray prevents squeaks, stiff steering, and premature wear.
Hit these spots:
- Steering column and rack. Turn the wheel lock-to-lock. If it feels stiff or grinds, apply grease to the steering gear.
- Suspension bushings. Spray silicone lubricant on all visible rubber bushings in the front and rear suspension.
- Brake and accelerator pedal pivots. A drop of oil on each pivot point keeps them smooth.
- Seat hinge and slider. If your seat tips forward for battery access, lubricate the hinge. Same for any seat adjustment tracks.
- Door and canopy latches. If your cart has doors or an enclosure, lubricate all hinges and latches so they operate smoothly.
For a complete list of maintenance intervals and lubrication points by brand, see our year-round maintenance guide.
Step 8: The Spring Test Drive
Everything checked? Time for a test drive. But take it slow the first time out.
- Start in a flat, open area like your driveway or an empty parking lot. No hills, no traffic.
- Accelerate gently. Listen for unusual noises from the motor, drivetrain, or suspension.
- Test brakes at low speed. Brake firmly from 5-10 mph. The cart should stop straight without pulling to one side.
- Turn in both directions. Check for steering looseness, clicking, or binding.
- Check the gauges. Verify the battery meter, speedometer (if equipped), and any warning lights are reading correctly.
- Drive for 10-15 minutes. This lets the brakes clear any surface rust and gives you time to notice anything that feels off.
If something sounds, feels, or smells wrong during the test drive, stop and investigate before driving further. Catching a loose bolt or dragging brake now is much cheaper than fixing damage later.
Common Spring Startup Mistakes
Even experienced golf cart owners make these errors. Avoid them and you will save money and headaches.
Adding water before charging. We already covered this, but it bears repeating because it causes the most damage. The electrolyte expands during charging. Add water after, not before.
Using tap water in batteries. Minerals in tap water coat the plates, reducing capacity by up to 15% over a single season. Distilled water costs $1-2. It is not worth the risk.
Skipping the full charge cycle. Unplugging the cart after 4-5 hours because "it seems charged enough" leaves batteries undercharged and promotes sulfation. Let the charger complete its full cycle every time. For a fuller breakdown of what is normal for 36V, 48V, and lithium carts, see our golf cart charge-time guide and our charger guide.
Ignoring cracked tires. Dry rot from winter storage is not just cosmetic. Cracked sidewalls can blow out at speed, especially on hot pavement in summer. Replacing one tire ($30-85) is cheaper than the damage from a blowout at 20 mph.
Driving on soft brakes. "They'll probably be fine" is not a brake inspection. If the pedal feels different than last season, get it checked before you drive in traffic or on hills.
Gas carts: running stale fuel. Old gas does not just cause hard starting. It leaves varnish deposits in the carburetor that get worse over time. Draining and refilling with fresh fuel takes 15 minutes and costs a few dollars. A carburetor rebuild costs $100-200.
DIY vs. Professional Spring Tune-Up
| Task | DIY Cost | Pro Cost | DIY Difficulty |
|---|---|---|---|
| Battery cleaning and water | $5-15 | Included in tune-up | Easy |
| Tire pressure check | $0-10 (gauge) | Included | Easy |
| Brake inspection | $0 | $50-150 (if repair needed) | Moderate |
| Oil change (gas) | $8-15 | $75-100 | Easy |
| Fuel system service (gas) | $10-25 | $50-100 | Moderate |
| Electrical check | $0 | Included | Easy |
| Full detail and clean | $15-30 | $50-100 | Easy |
| Lubrication | $5-10 | Included | Easy |
| Full spring tune-up | $25-75 | $100-200 | — |
Do it yourself if: You are comfortable working on your cart, your batteries are under 4 years old, and nothing felt off when you parked it last fall. Most of these steps require basic tools you probably already own.
Hire a professional if: Your batteries are aging and you want a proper load test, your brakes need adjustment, your gas cart has persistent starting issues, or you just want peace of mind from someone who looks at carts every day. Find a trusted repair shop near you or browse our dealer directory to locate authorized service centers.
Your golf cart insurance may also require annual service records, so a professional tune-up creates a paper trail.
Accessories Worth Adding This Season
While you have the cart apart for spring prep, it is a good time to add a few accessories that make the riding season better. Our complete accessories guide covers dozens of options, but here are the most popular spring additions:
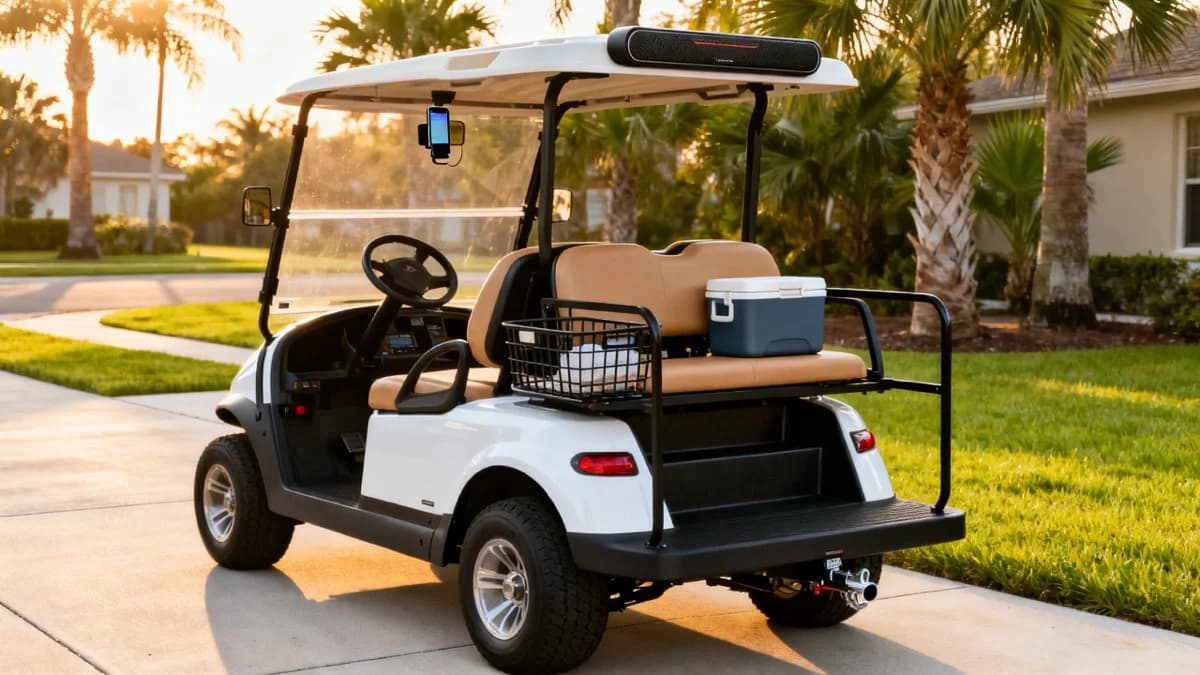
Phone holder. You will want your phone accessible for GPS, music, or just checking messages. The HonicWang Magnetic Alloy Phone Holder (~$20) uses a MagSafe-compatible magnetic mount that attaches to any metal surface on your golf cart without drilling. Just drop your phone on and go.
Upgraded mirrors. If you drive on public roads or in busy neighborhoods, good mirrors are a safety essential. See our mirrors buyer's guide for top picks.
Storage cover. If your old cover is torn, stained, or lost its water resistance after this winter, replace it before next season catches you off guard. Our covers guide compares the best options by cart size and brand.
For more upgrade ideas, check out our customization and mods guide.
Frequently Asked Questions
How do I get my golf cart ready for spring?
Fully charge batteries, check water levels (lead-acid only), inspect tires to 18-22 PSI, test brakes, clean the body and seats, check all lights, lubricate moving parts, and take a careful test drive. Budget $25-75 for DIY or $100-200 for a professional tune-up.
Should I add water to batteries before or after charging?
Always charge first, then add distilled water. Charging causes electrolyte to expand, so filling before charging leads to acid overflow and corrosion damage.
What PSI should golf cart tires be?
Most golf cart tires run 18-22 PSI. Check the sidewall for the manufacturer's specific recommendation. Under-inflated tires reduce range, wear unevenly, and handle poorly.
How do I know if my golf cart batteries need replacing?
Replace batteries if they will not hold a charge after 12 or more hours of charging, show resting voltage below the thresholds in the table above, have cracked or bulging cases, or are over 5-6 years old. A full lead-acid set costs $600-$1,500 depending on voltage system and brand.
Can I use tap water in golf cart batteries?
No. Always use distilled water. Tap water contains minerals that coat battery plates and reduce capacity. Distilled water costs $1-2 per gallon.
Do lithium batteries need spring maintenance?
Minimal. Check BMS indicator lights, verify connections are tight, and inspect for physical damage. No water, no corrosion cleaning, no equalization charging. Lithium batteries are one of the biggest advantages of a lithium conversion.
What should I do if my golf cart will not start after winter?
Check individual battery voltage with a multimeter. If batteries are below 50% charge, use a standalone trickle charger on each one to bring them up individually. Check cable connections, fuses, and the key switch. For gas carts, drain stale fuel, check the spark plug, and try fresh gas. If your cart still won't start after winter storage, our step-by-step diagnostic guide walks through every possible cause. Our troubleshooting guide has a complete diagnostic flowchart, and the golf cart troubleshooting tool can estimate the likely repair range. If the cart cannot be moved, compare mobile golf cart repair providers before arranging transport.
When should I hire a professional instead of doing it myself?
Hire a pro if your batteries are over 4 years old and need load testing, if brakes feel soft or make grinding noises, if your gas cart has persistent starting issues, or if you smell anything unusual. A professional spring tune-up typically runs $100-200 and catches problems before they leave you stranded.
Golf Cart Search
Find the Best Golf Carts of 2026
Compare top-rated models, read expert reviews, and find the perfect cart for your needs.